#free lightroom preset
Explore tagged Tumblr posts
Text
PRESET COLD HEART BY GHOSTLIAS🎁
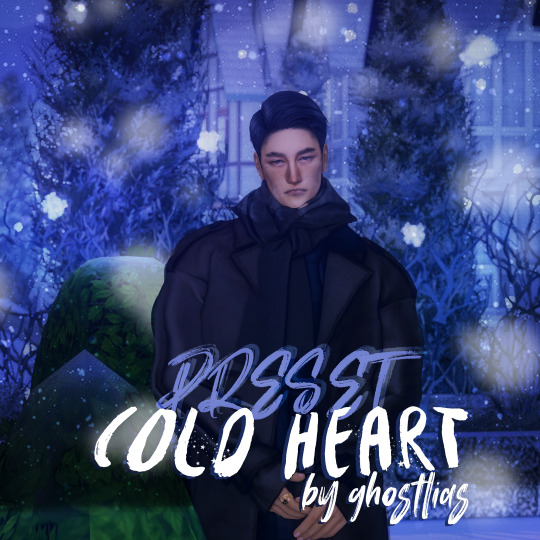
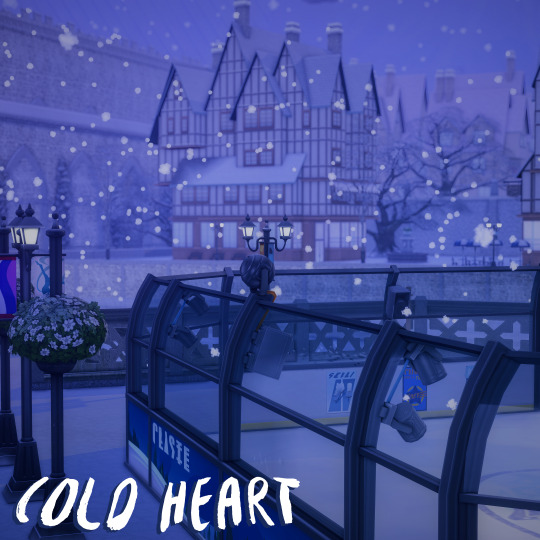
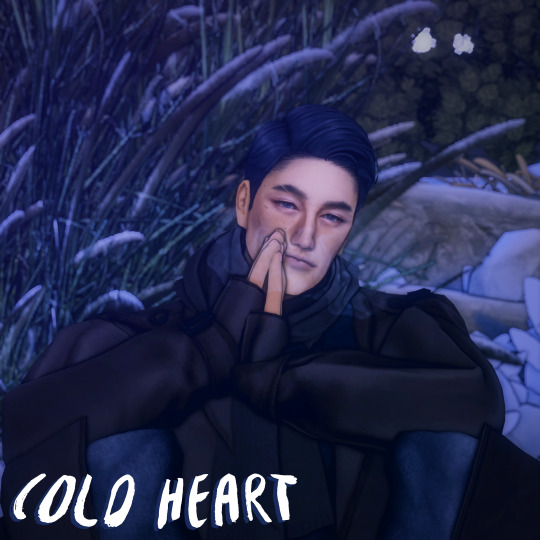
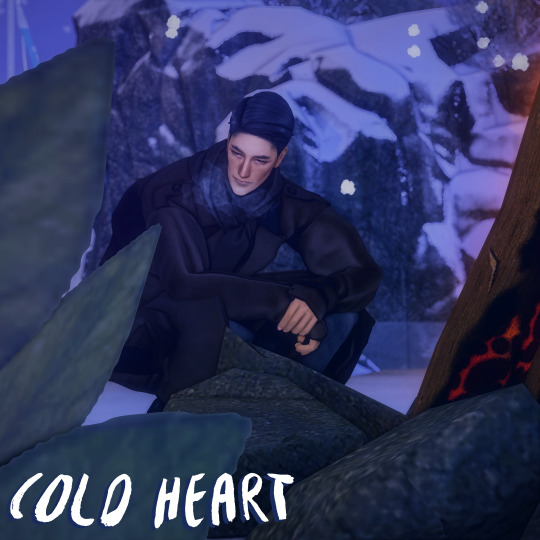
The preset is perfect for winter, especially in a snowstorm or just in snowy weather! 🤩To fully experience the atmosphere of this preset, I strongly recommend using New Year's textures. 🤩
The preset was created on Gshade version 3.5.2 (There will be minor changes on other versions!)
📌You can change the preset as you like, but re-upload and assign authorship - no.
Go to the WEBSITE to receive the rest of the gifts from other participants!🎁
download / ALT !FREE!❤️
#sims 4 screenshots#sims4cc#the sims#sims 4 gameplay#sims 4 story#s4cc#simblr#sims 4 custom content#ts4 legacy#sims screenies#ts4 cc#ts4 cas#ts4 gameplay#ts4cc#ts4#ts4 simblr#ts4 screenshots#the sims 4#sims 4#sims community#ts4 free cc#ts4finds#my sims#sims 4 cc#sims4#sims4 preset#ts4 preset#sims 4 preset#lightroom presets#preset
30 notes
·
View notes
Text
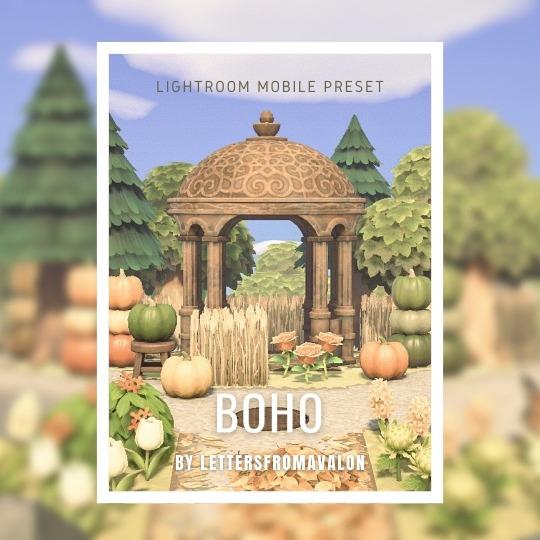
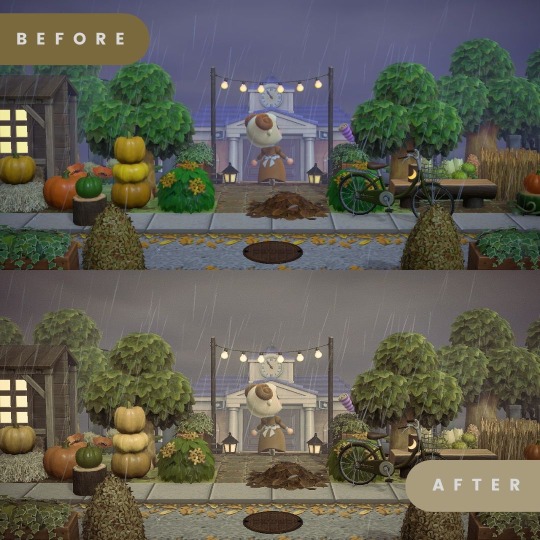
Go get my new preset on ko-fi, it’s free!
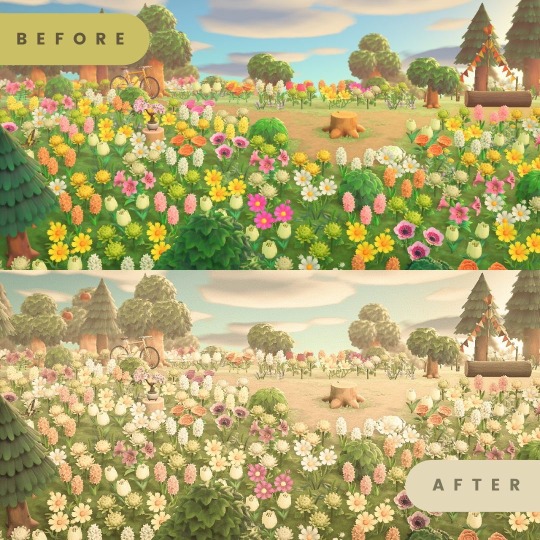
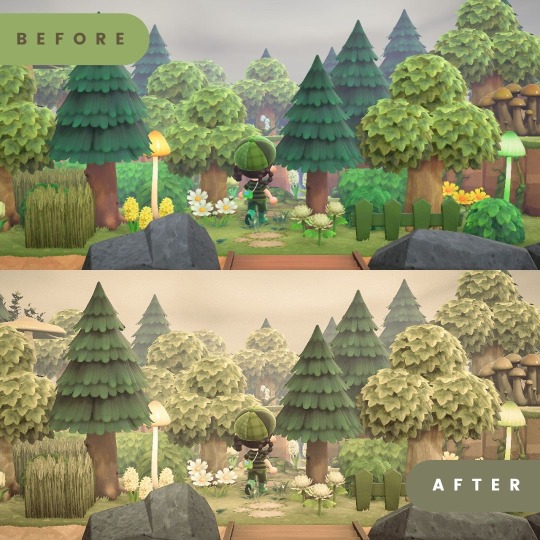
#acnh#nintendo#switch#acnh photos#animal crossing#animal crossing new horizons#acnh island#letters from avalon#animal crossing designs#adobe lightroom#lightroom#free#free preset#presets#lettersfromavalonpresets
12 notes
·
View notes
Text
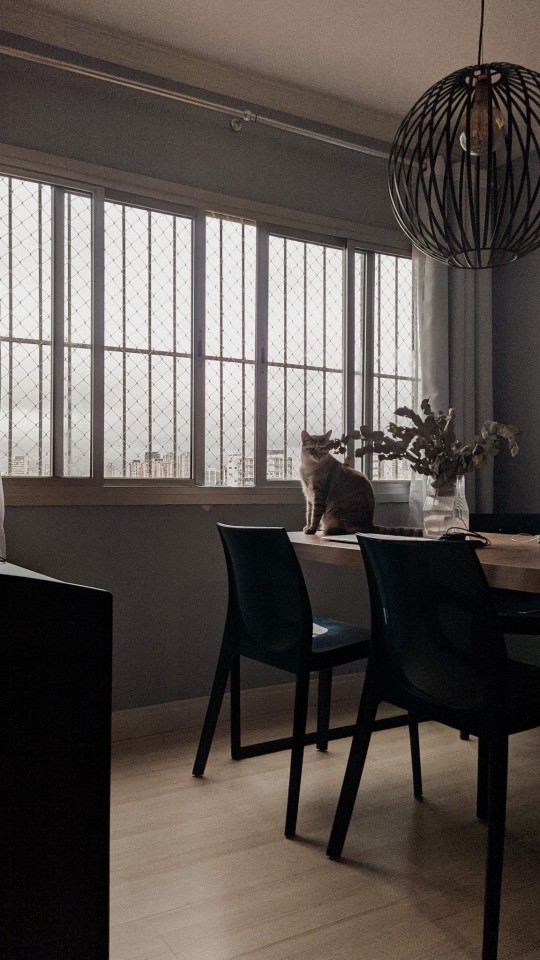
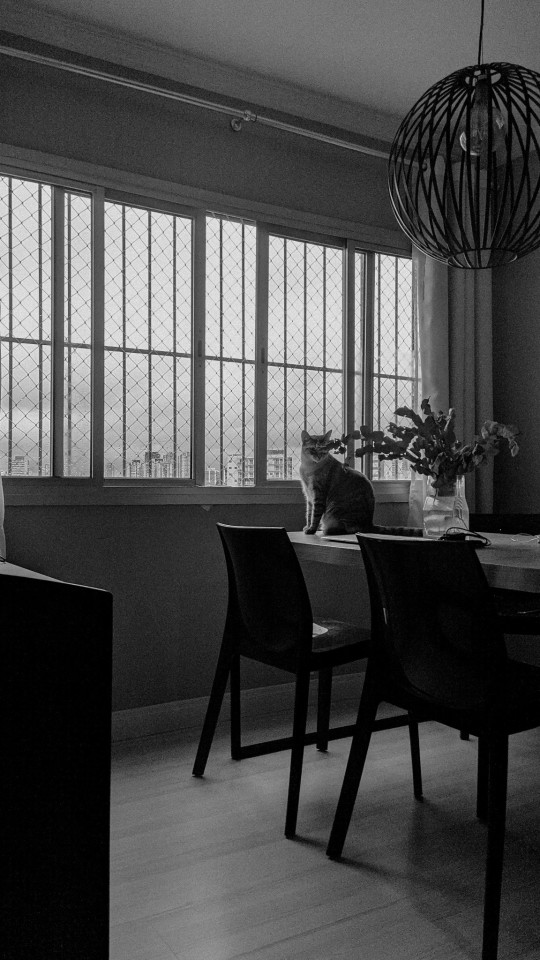
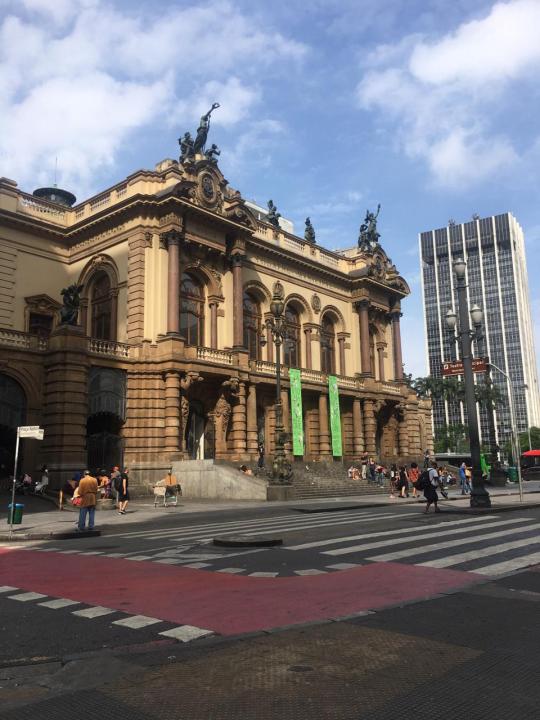
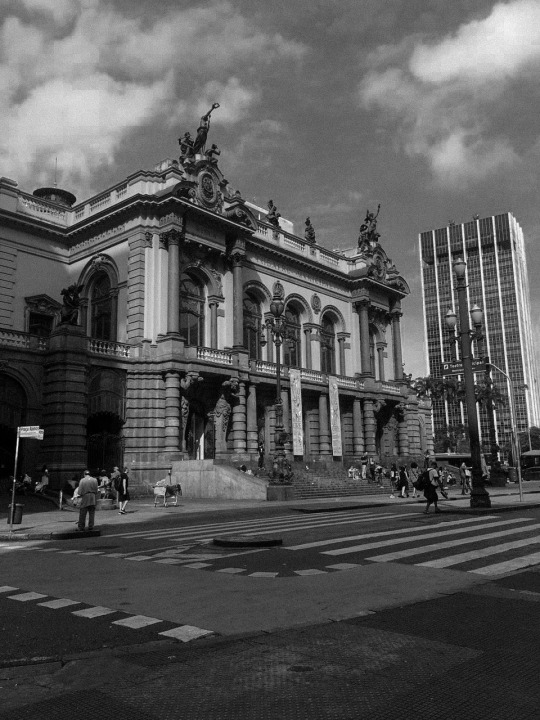
Preset para Lightroom Mobile
Se utilizar dê like!!
Foto feita por @loppes.rafa
Baixe AQUI
#lightroom presets#mobile presets#preset#presets#presets mobile#lightroom#presets lightroom#presets lightroom mobile#presents lightroom#mobile preset#lightroom mobile#mobile#presets free#free presets#free#filtro instagram#instagram filter#instagram
18 notes
·
View notes
Text
Wedding photo editing and correction in adobe Lightroom.
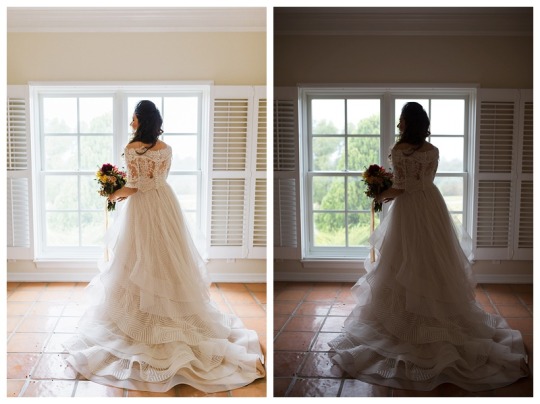
#Color correction presets in Lightroom are a great resource for resolving color issues. The glair was seen in the pictures below. It produced#💌 Get in touch with us and DM me.#Are we the finest? Well#the jury is still out. Provide us with two pictures for trial period is completely free. for Free at [email protected]#1. Crop/Resize photo#2. Colour correction#3. Lighting/Contrast adjustment#4. Detail adjustment#5. Noise reduction#6. Sharpening#7. Create custom filter/effect/preset#photoretouching#photoretouchingservice#photoretouchingservices#ᴘʜᴏᴛᴏʀᴇᴛᴏᴜᴄʜɪɴɢ#photoretouchingserviceavailable#photoretouchingartist#photoretouchingagency#photoretouchinga#photoretouchingacademy#photoretouchingâ#photoretouchingbeautyphotography#photoretouchingbyme#photoretouchingbycourtney#photoretouchingbyjames#photoretouchingbeauty#photoretouchingchallenge#photoretouchingcompany#photoretouchingcourse#photoretouchingclass
0 notes
Video
youtube
(via Vessey Film | Free Lightroom Preset on Behance)
1 note
·
View note
Text
Enhance your photos with Venter Visuals' Adobe Lightroom presets
Transform your photos with ease using Adobe Lightroom presets from Venter Visuals. Browse our collection of professionally crafted presets and take your photography to the next level. Shop now.
0 notes
Link
Transform your photos with our easy-to-use Best Lightroom Presets. Pixmellow offers library of presets is perfect for any style, from adventure and travel to lifestyle and portrait photography. Quickly edit and enhance your photos with just a few seconds. Visit now!
0 notes
Text


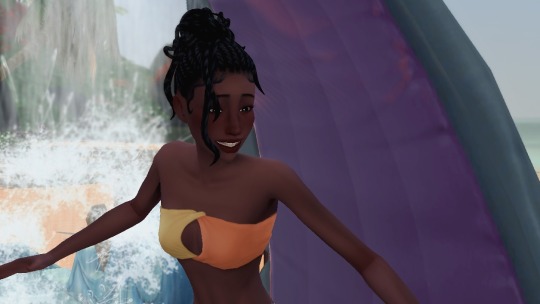
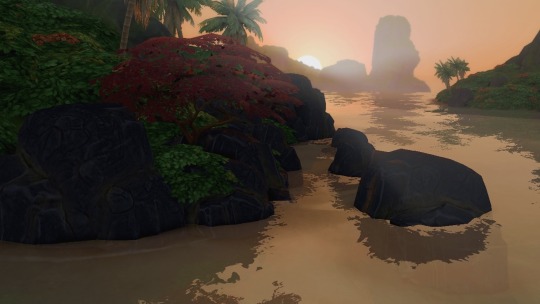
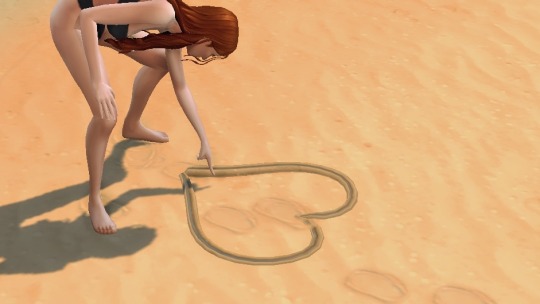
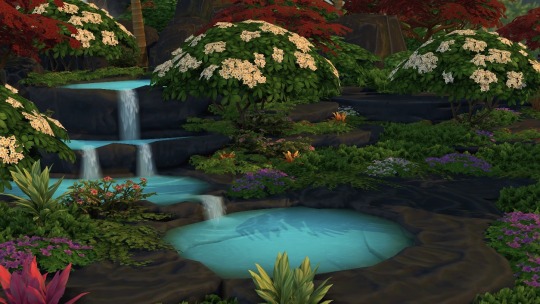
Utopia - a reshade preset
This is the main preset i use so i decided to share it! Utopia is a pretty subtle preset that adds a bit more shadows and saturation (mostly to warm colors). It also makes yellows a bit more orange and blues more cyan.
You need some of the quint effects for this preset (mxao, deband, and lightroom)
I use sunblind for lighting
Make sure to turn off edge smoothing for mxao to work correctly!
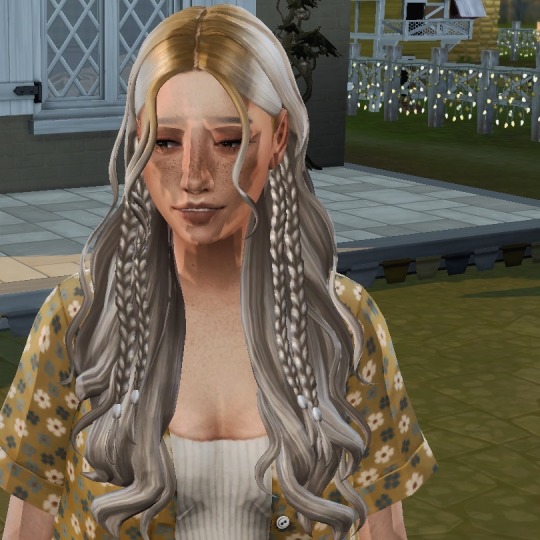
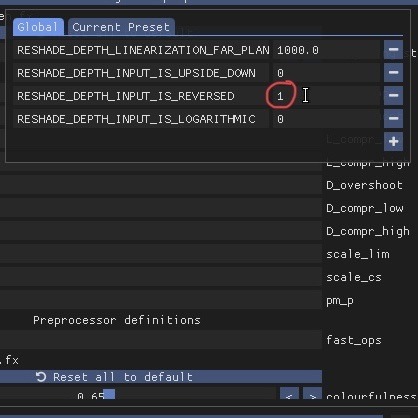
If the preset is looking anything like the picture below you may need to go to mxao then edit global processor definitions and change the number i circled from 1 to 0 to fix this!
Download: Patreon (free)
#ts4#ts4cc#the sims 4 reshade#ts4 reshade#ts4 screenshots#ts4 download#sims 4 download#reshade#reshade preset#ts4mm#simblr#the sims#gshade#s4cc
39 notes
·
View notes
Text
Virtual Photography Process
I got an ask that I posted by accident before being ready, so I'm going to make this a post I suppose fmdlksg Anon was asking about my Reshade Preset for Cyberpunk and what my VP process is, so here it is!
Anon, I don't quite have a VP process. Not in a trademark way anyway. My VP varies wildly across the years and generally speaking I just go with the vibe I feel at the moment!
I've had phases where I would barely do any post-processing at all and only rely on heavy Reshade, I had phases where I'd do some minor color tweaking and add a lot of effects like dust and sparks, and my current one where I do pretty much all my color tweaking in post-process and only really use light Reshade to sharpen the image and make colors pop a bit.

My current Reshade is a tweaked version of a friend's preset. I have an average rig, don't have any Fancytracing, so Reshade is mostly there to sharpen the image, deepen the colors and try to compensate for my GPU's limitations. I forgot to use Otis DOF for this example, but nowadays I don't use any Reshade DOF, and rely only on Otis'. I also only use Otis lights because I can control what each light does a little better than AMM lights, but I used AMM lights a lot when I first was VPing.
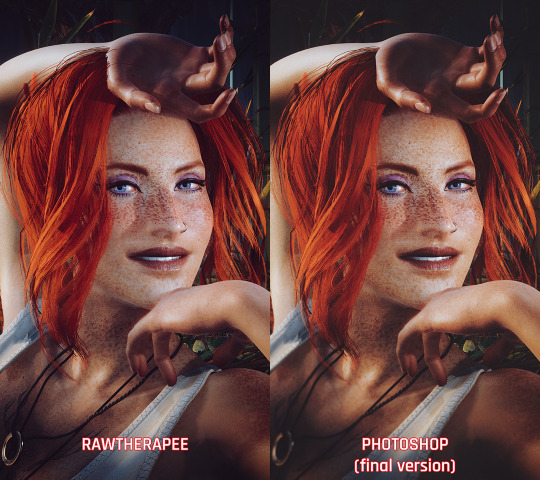
It's when the game's closed that I have my fun with colors!
I do my coloring on RawTherapee, which is a free Lightroom. Mostly I make use of the Film Simulation, sometimes layering multiple, sometimes using only one.
I then move to Photoshop which is my last stop and my "correction" phase. I have a huge library of actions and gradient maps I paw around for any last coloring (specially making shadows more matte and less defined), tweak contrast/brightness, and add some blurring and noise (beloved).

I probably have actions/gradient posts reblogged on my repository blog (@halkuonn), I can't point you to a single place because I've been dragging these around for over a decade and across at least 3 computers...
Honestly, don't get too attached to a single workflow with your VP. VP is art and art is meant to be a creative outlet, if you start putting too many rules and step by steps on your personal workflow, you'll probably get frustrated fast.
My current workflow is way lengthier than how I took some of my older VP, but that's because I feel like doing it. I don't necessarily feel like it's better or worse, it's just a different way I've been doing stuff and having fun with VP.

This is from 2022 - I wasn't using Otis Freecam, relied on AMM Lights, and did some mild/low post-processing - things like making the shadows a little bit more purple with Color Balance, and adding A LOT of blur manually because I didn't know how to use any of the DOF shaders. I was using Pinky's Preset back then.

This is from 2023 - the fuck it we ball era. This has like... 0 post-processing. I wasn't using Otis DOF (I don't think it existed yet), but I was already using Otis Lights learned to use the DOF shaders. The only thing I was doing for post-processing is add Noise and slap my signature (which this one doesn't even have lmao). I already had a new Reshade preset from my friend, but didn't really tweak any of it.

From this year! I still wasn't using RawTherapee a lot, but it was the start of my "I'm going to do everything in post-processing" era, with shadows not as dark/contrasted and everything a bit hazy.
So yeah! Don't stress about having a single workflow, or the best workflow, or even the most appropriate Reshade. For me the less I try to be biblical about my VP process, the more I enjoy taking it, and in turn the more satisfied I am with the results.
If you want more of a tutorial, I can try?? doing one?? but really the only thing I have been consistently doing with my VP all these years is slapping some extra blur and adding Noise on PS.
Hope this helps or at least provides some software recommendations / process ideas though!
24 notes
·
View notes
Note
where do u find stuff for ur edits?? i wanna start makin my own but idk where to look
everything from twst is official. this includes card art, images from the manga, and assets from the game itself. the twst wiki is an easy place to find most of the art itself, otherwise @/alchemivich and @/twstassets both have resources from within the game. (item icons, full-body renders, etc.)
as for everything else, it comes from canva exclusively. i do not use google images, pinterest, weheartit, or AI image generators. there are a number of issues with each, usually boiling down to art theft.
pinterest and weheartit are both notorious for art theft of multiple mediums. someone uploading an image to pinterest does not mean they are the one who created it. furthermore, i do not use fanart, and fanart reposting in particular is rampant on pinterest.
AI image generators scrape for their data, meaning anything generated is an amalgamation of other's work, most often without their knowledge or consent. generative AI also uses a ton of water.
canva, on the other hand, is essentially clipart and stock photos. the art being used is with consent, and the artist or brand is included with the information about each piece. you can even sort by brand or artist.
i'm aware this is not the widely preferred source, but it's how i make everything you see here. i don't feel comfortable with the very easy potential of perpetuating art theft with other sources, and i know that i am not running that risk by utilizing canva's library.
all of my presets are made by me in the lightroom mobile app, and i have a post about that linked in my pinned post. all of my presets are free to use.
the only other thing i use is the medibang app. i can no longer recommend this given how invasive the ads have become, but it's what i'm used to, so i haven't switched to anything else yet. i use medibang for a variety of different things, such as making something transparent, manga coloring, and anything resembling these sets.
10 notes
·
View notes
Text
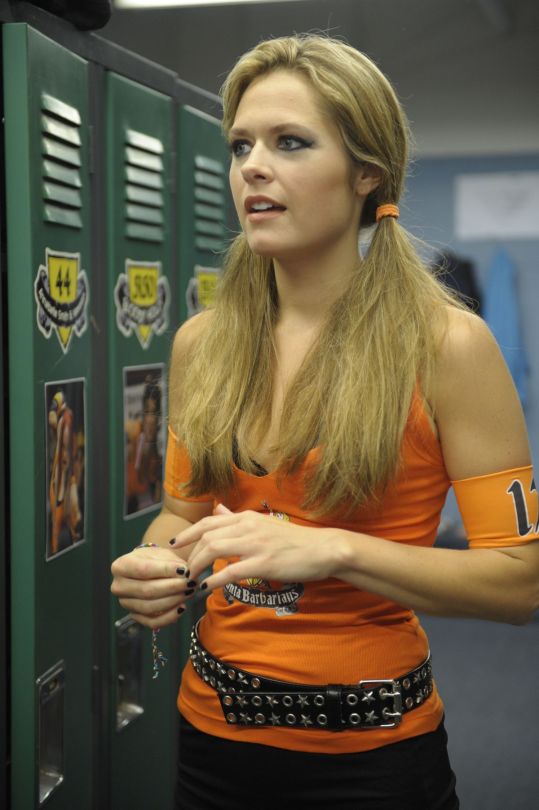
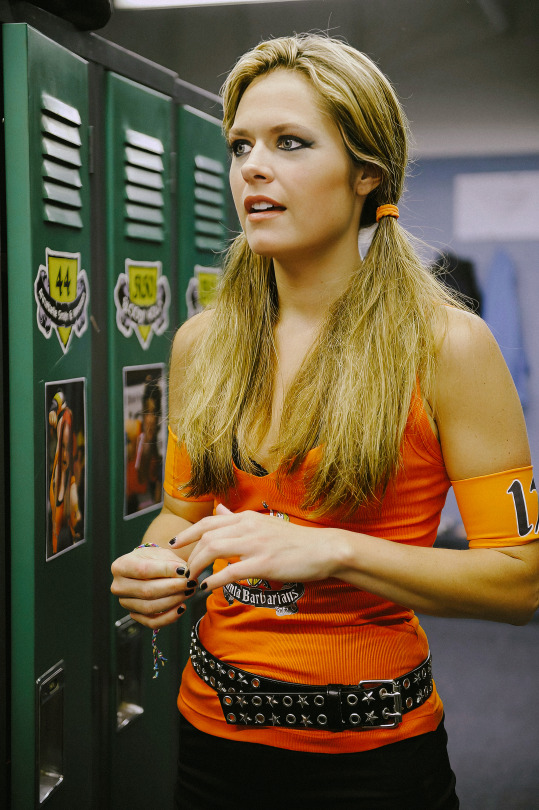
our upscaled and enhanced photo of Juliet O'Hara (Maggie Lawson) on Psych
Little BTS update: We're playing around with Adobe Lightroom now! This photo was partly edited using Alex Ruskman's free presets that simulate Fuji Pro 400H photos :)
7 notes
·
View notes
Text
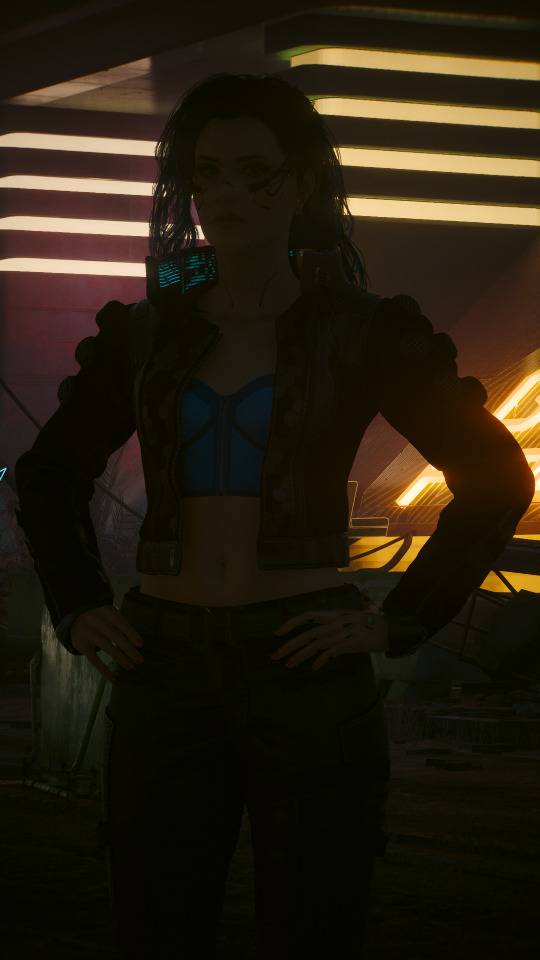


I saw someone recently ask why their shots weren't turning out how they wanted them to despite being able to support the highest graphical settings, so I thought I could share a little behind-the-scenes tidbit re: my approach to lighting and post-editing in VP in case it's useful.
And for my money, lighting is one of the most important factors in getting a shot that I'm happy with. Yes, a high-end graphics card can absolutely help, but that's just one tool of many that can make a difference.
(This info is probably most relevant to folks who can mod their game, but the overall principle can also be applied to vanilla photomode, too. You'll just have to find good in-game light sources since you won't be able to spawn your own, and it might require a little more finagling with the vanilla photomode exposure and contrast settings. Here are some 100% vanilla shots I took recently that I think turned out pretty decent even with those limitations, just to give you some ideas if that's what you're working with.)
Lighting & Exposure
So referencing the photos above, from left to right:
A purely vanilla shot with ray-trace enabled but no lighting tools
The same shot with lighting tools on Valerie
The same shot with lighting tools + some Lightroom editing
Beefy graphics cards can certainly make a difference here since they'll be able to render more nuanced light and shadows, but as you can see in the purely vanilla shot, that ray tracing on its own ain't doing much when it comes to lighting Valerie. The neon lights in the background are pretty, but she's barely even visible in that dark ass street.
In the second shot, Valerie is in the exact same location but has multiple light sources on her. I mostly use CharLi lights these days, which is a free suite of lighting tools available on Nexus, and the customizable ambient lights in AMM, also free on Nexus.
I didn't think to screencap my exact lighting setup, but I'm pretty sure it was something like this:
CharLi spotlight on the left and right of Valerie, tinted pink/magenta
CharLi spotlight on the upper right, tinted teal
(I think I might have had an orange CharLi spotlight too, but it wasn't visible from this angle)
2 CharLi white spotlights directly on Valerie
Probably 1 or 2 AMM customizable point lights on her face (I like using the point lights at very low brightness to accentuate faces and give them a nice glow)
Now putting all these lights on a character could end up way too bright at the default vanilla exposure, especially if you aren't using any kind of major Reshade overhaul (which I do not).
Instead, I just use the vanilla photomode exposure settings to make a scene really dark and then light it back up with my own tools. (This is also a great way to shoot in areas that might have weird lighting effects, and it can be done indoors or outdoors and at all hours of the day.)
Just a simple example of that in these shots:

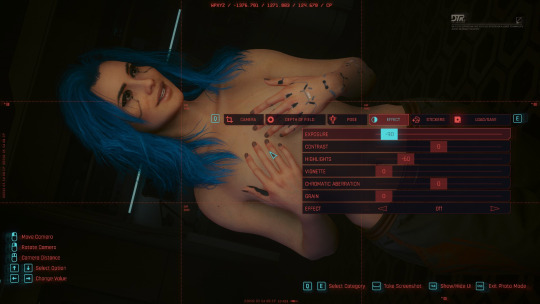
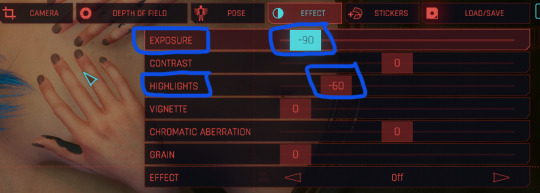
On the left, Valerie has a spotlight on her face and chest--It's pretty bright, too bright for my tastes. On the right, she has the same spotlight, but the overall exposure has been dropped down to -90 and the highlights have been dropped to -60 (now it's a little too dark for my taste--If this was gonna be a real shot, I'd build up more lights, but just wanted to show how much altering the exposure can affect a shot).
Post-Editing
As for making further adjustments to colors, shadow levels, sharpness, etc. of a shot, I know a lot of folks prefer to do that with Reshade presets, but... I don't, haha. I did make a basic shader to reduce the green tint of the game, and I use the Cinematic DOF and Real Long Exposure shaders to get a nice depth of field and reduce hair pixelating. Otherwise, all other adjustments I make are in Adobe Lightroom (or Photoshop if I need to make more precise adjustments).
And it's just a personal preference here. I just don't like having to mess with too many mods and menus in-game--I feel like it increases the chance of something freezing or crashing or me accidentally closing out of photomode. It also helps to give me a new perspective to see the shot outside of the game, especially if it's a portrait-oriented shot. Plus, I just like the process. Gives me one more reason to stare at the blorbos for a little while. :3
I adjust each Lightroom preset as needed depending on the color and exposure of the shots I'm working with, but these are some of the more common settings I modify:
I almost always finetune the exposure and shadows/highlights.
I like to do a global increase for saturation and vibrance.
A lot of my presets increase the saturation of reds and blues and decrease the saturation of yellows and greens, but this can vary; e.g. i like the greens to be vibrant if it's a nature shot.
I also usually make the white balance a little cooler.
I love tinkering with the global curves settings to "flatten" the shadow levels.
And I like really crispy shots, so I always increase the sharpness, and I'll usually bump the texture and add some noise, too.
These are all things that can be done in other similar programs/apps or even with Reshade. If you're just starting out, I think using pre-made presets and filters is a great way to go, and as you get more comfortable with the tools, you can start to make little tweaks and edits to personalize the style.
So anyway, there's some of my process! Everyone's got their own, and what works for me might not work for you--Don't feel like you have to take any of this as gospel or work exactly the way I do. But maybe this will... shed some light (ha ha, I'll see myself out) on how to get started with some VP tools. <3
43 notes
·
View notes
Note
Hey!!! Im a little shy (sorry for anon) but I was wondering how did you learn to take bg3 screenshots THAT LOOK SO AMAZING! I can’t seem to find anywhere on your blog if you already talked about it before. If it’s not too much trouble (and if it’s not your own creative secret) could you at least briefly describe your process? I get absolutely baffled and amazed when I see your posts. Like the angles, the lightning, the colors, the poses look absolutely stunning! I’m so glad I found your blog ❤️
Hi ! Thank you for the kind words :) . Technique depends on the photos - what kind of photo is it, what effect do I want to achieve. I have a tutorial on YouTube on how to take screenshots, but it is a bit outdated (I improved my skills) and it is in Polish. The topic is quite extensive, so it would probably be easier to explain how I achieved a specific effect in a specific photo. You can send me a DM - you don't have to be shy, I don't bite :D. I helped one person in taking screenshots, so I'll be happy to help you too :). From general information, the tools we use are important for taking screenshots. I use ReShade and Otis free camera mod. For editing Lightroom and Photoshop - I used to work as a photographer, so I know these programs. Sometimes I use ready-made presets from Nexus for ReShade, which I slightly modify, and then edit the screenshot in Lightroom and Photoshop. Lightroom and Photoshop is my main working tools.
A trick I can recommend to have nice, delicate light for portraits - talk to the character, make a quick save and do a quick load - then the light will be better for photos :) .
As for the rest, as I mentioned, the topic is extensive, so you can send me a DM and we will talk there, or you can send the questions about how I took a specific photo and how to achieve such an effect.
I hope everything is understandable - English is not my native language.
9 notes
·
View notes
Text

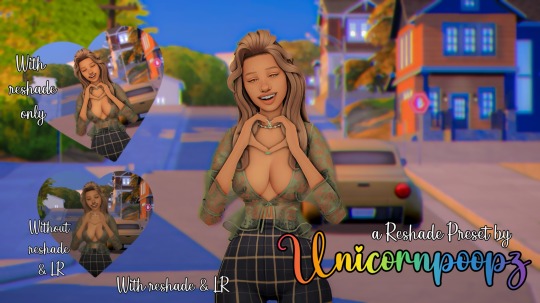
So this is a new tumblr, because I accidentally deleted my OG one. I guess I should make a little post with some photos of my reshade preset.
Here are some before and afters and a link to the FREE download on Patreon.
Also, all the info is in the post on Patreon 💛
Free reshade preset download here
Free Lightroom presets download here
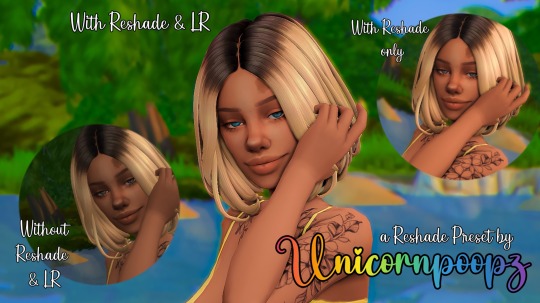
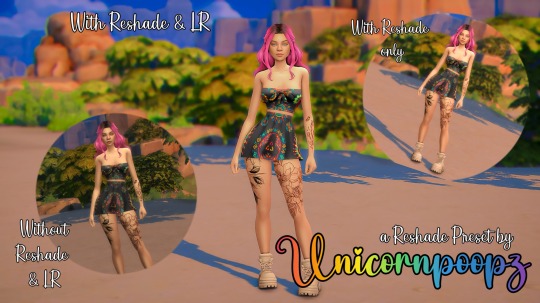
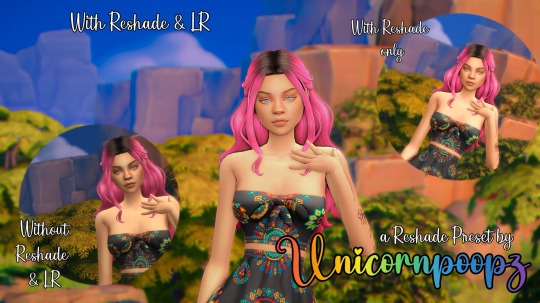
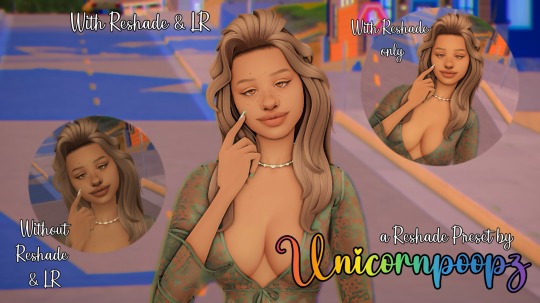
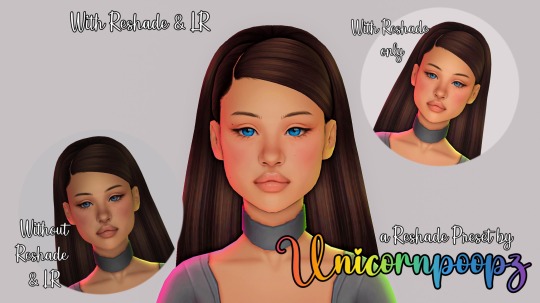
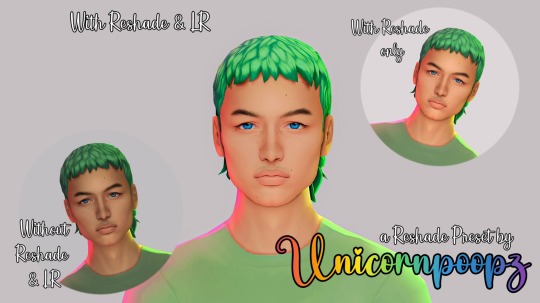
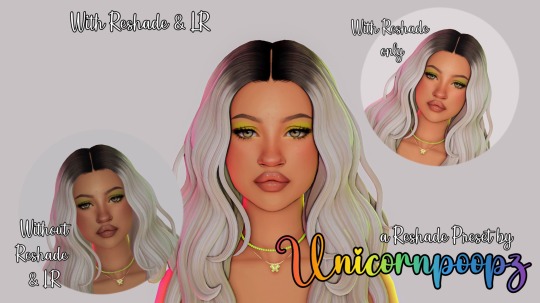
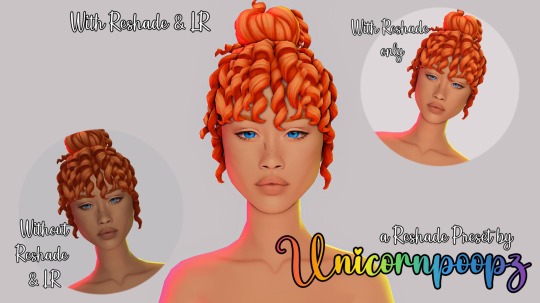
Free reshade preset download here
Free Lightroom preset download here
#the sims#the sims 4#the sims community#the sims gameplay#the sims legacy#the sims screenshots#unicornpoopz#unicornpoopz reshade#unicornpoopz gshade#unicornpoopz lightroom preset#unicornpoopz presets
28 notes
·
View notes
Text
50 Free High-Resolution Texture Packs for Designers
New Post has been published on https://thedigitalinsider.com/50-free-high-resolution-texture-packs-for-designers/
50 Free High-Resolution Texture Packs for Designers
The number of options, directions, and aesthetic approaches you can take from simply adding a texture to your work is mind-boggling. Of course, not every design, photo, or video benefits from even the most subtle of textures, but you might be surprised at how a high-resolution texture can bring a design to life.
Knowing when to use a texture and which texture to use comes down to the flow of the design and the priority of information on the page. It is a good idea to keep certain textures in mind while working on a project, but don’t finalize them until you’ve seen the design as a whole.
Texture selection can be an involved and time-consuming process. Firstly, you have to search for that particular texture your design needs, and secondly, you have to test and tweak it to discover the one that actually works.
It is that search process we aim to help you with. We have a huge selection of free high-resolution textures for you today that are just shouting out for use in your next project.
14,000+ Actions, Brushes, and Layer Styles for Photoshop
Photoshop Actions & Brushes, Lightroom Presets, Illustrator Brushes, Procreate Brushes, and much more!
What are Textures?
Textures are visual and tactile elements that can add depth and dimension to your design projects, photographs, or videos. They provide a sensory experience akin to touching a textured surface.
They can range from a concrete wall’s rough, gritty feel to a silk fabric’s soft, smooth appearance. Textures add a layer of realism, creating an engaging visual and emotional connection with your audience.
How Can Textures Enhance Your Projects?
Textures can infuse your designs with visual interest and variety, breaking up monotonous or flat surfaces. Whether working on a website, print material, digital art, or video, textures can make your work stand out.
Different textures can evoke specific emotions. For instance, a wooden texture might convey warmth and rustic charm, while a metal texture could evoke a sense of modernity and strength. Understanding these associations allows you to communicate effectively with your audience.
Textures can add depth to your work, making them more realistic and relatable. This can be particularly important for product presentations or architectural renderings.
Free Paper Textures
10 Ripped Paper Texture Set (By TuomoDesign, PNG)
5 Glued Paper Textures (By Indie Ground, JPG)
6 Free Wrinkle Paper Textures (By Deezy, JPG)
16 Free Vintage Paper Textures (By Nassy Art, JPG)
10 Free Marble Paper Textures (By Nastia Smiyan, JPG)
Free Dirt & Grit Textures
18 Free Grit Textures (By Diego Arriagada, PNG)
Vintage Grit Textures (AI, EPS & PNG)
10 Free Dust & Dirt Overlay Textures (By GraphicsFuel, JPG)
14 Urban Textures (By Nova Design Co, JPG, PNG & EPS)
Free Vintage & Retro Textures
8 Free Vintage Textures (By Flash Graphics, AI & EPS)
10 Vintage Halftone Textures (EPS & PNG)
10 Vintage Noise Animated Textures (By Diego Darriagada, AE)
12 Film Dust Vintage Grunge Textures (By MiksKS, JPG)
24 Authentic 1930s Vintage Postcard Textures (By Spoon Graphics, JPG)
Free Grunge Textures
50 Grunge 4K Textures (By Erkan Kirdar, JPG)
24 Free Grunge Textures (By LTC Shop, PNG)
10 Free Digital Grunge Textures (By Pale Supply, EPS & PNG)
Blackview Free Vector Grunge Textures (By The Designest, PNG & EPS)
5 Subtle Grunge Vectors (By Liam McKay, PNG, EPS, SVG, AI & JPG)
10 Free White Subtle Grunge Textures (By GraphicsFuel, JPG)
Free Grain & Noise Textures
20 Subtle Grain Textures (By Bart Wesolek, JPG & PNG)
10 Film Grain Textures (By Arkadzi Ulitski, JPG)
5 Photocopy Noise Textures (By Indieground Design, JPG &PSD)
Free Abstract & Fractal Textures
10 Vivid Gradient Abstract Textures (By Unio Creative Solutions, AI & PNG)
8 Free Ethnic Abstract Textures (By Creative Veila, PNG)
8 Free Abstract Watercolor Textures (By Creative Veila, PNG & JPG)
5 Holographic Textures (By Indieground Design, JPG)
18 High-Resolution Fractal Textures (By Elliot Pessah, JPG)
Free Stone & Concrete Textures
20 Stone Wall Textures (PSD)
Vector Concrete Texture Pack (By Phil Goodwin, PNG & EPS)
5 High-Resolution Brick & Tile Textures (By Michael Hylton, JPG)
10 Old Wall Textures (By GraphicsFuel, JPG)
10 Marble Textures (EPS & PNG)
10 Free Concrete Textures (GraphicsFuel, JPG)
Free Metallic Textures
12 Free Copper Textures (By The Designest, JPG)
9 High-Resolution Metal Surface Textures (By Orman Clark, JPG)
Free Paint & Graffiti Textures
Free Artistic Paint Textures (By Deezy, JPG)
14 High-Resolution Graffiti Textures (By Orman Clark, JPG)
16 Free Sprayed Vector Texture (By Texture Fabrik, EPS & PNG)
Free Wood Textures
5 Free High-Resolution Wood Textures (By Isaac Gube, JPG)
12 Organic Textures (PSD & AI)
20 Organic Vector Textures (By GraphicsFuel, PSD)
10 Free Withered Wood Textures (By GraphicsFuel, JPG)
Free Wood & Paint Textures (By Eilert Janen, JPG & PNG)
Free Fabric Textures
9 High-Resolution Fabric Texture Pack (By Orman Clark, JPG)
25 Denim Textures (By Bart Wesolek, PNG & EPS)
6 Free High-Resolution Fabric Textures (By Design Instruct , JPG)
Free Black & White Textures
22 Textures on Black Backgrounds (By Media Militia, JPG)
Black & White Seamless Textures (By Timxez, JPG)
Free Miscellaneous Textures
100 Fire & Flame 4K Textures (By Hyperpix, JPG)
Seamless Vector Textures (By Timxez, EPS & PNG)
10 Chalk Textures (AI, EPS & PNG)
7 Plastic Textures (By Alessandro Silva, JPG)
How to Incorporate Textures into Your Workflow
Once you’ve found the textures that resonate with your project, integrating them is a straightforward process. Most photo and video software allows you to overlay textures onto your artwork. You can then adjust their opacity and blending modes to achieve the desired effect.
Remember to consider the context of your project when choosing textures. Whether you’re creating a vintage poster, a modern website, or an artistic masterpiece, textures can be your trusty companions on the creative journey.
By understanding the role of textures and experimenting with their application, you can breathe life into your work and engage your audience on a whole new level.
While it is true that you can use very subtle, unobtrusive textures, you should also keep in mind that some textures can draw the eye more than just a solid color. This means that it’s best to use textures that create contrast and highlight areas of the page that are important.
Related Topics
Top
#000#4K#ai#amp#Art#Color#concrete#course#Design#designers#dust#emotions#eye#flash#Free Templates#Free Textures#High-Resolution#holographic#how#how to#illustrator#it#life#Lightroom Presets#material#media#metal#mind#noise#One
18 notes
·
View notes
Text


JUNE EVENING – Reshade 6 Preset for Sims 4 I play a lot for komoryobians and spellcasters, hence so many screens from those worlds. But the preset was tested on other towns as well ;) HOTKEYS MagicDOF (blur) - Shift + 1 MXAO (shadows) - Shift + 2 Lightroom (contrast lighting) - Shift + 3 MagicHDR (daylight haze effect) - Shift + 4 Levels + Vignette (brightness reduction and darkening on the sides) - Shift + 5 INSTALLATION Download Reshade Place the preset file in Game/Bin The following libraries will be needed for some shaders: MagicHDR - FXShaders ZN_LC - ZN_FX Clarity - AstrayFX Colormatrix, FakeHDR, Levels, LumaSharpen, Sepia, Tonemap, Vignette - SweetFX Colourfullness, DOF, Filmicpass, Finesharp - Legacy Shaders qUINT_bloom, qUINT_mxao - qUINT Colormask - CorgiFX You can install these libraries with Reshade setup
ABOUT GSHADE If you use GShade, this preset will probably work for you too - most reshade presets are compatible with Gshade (but not vice versa), since Gshade is based on reshade. However, I can't guarantee that you won't need to tweak something for yourself. But this is also true for reshade users - after all, everyone's perception of colors is different. DOWNLOAD (SFS, Free)
14 notes
·
View notes